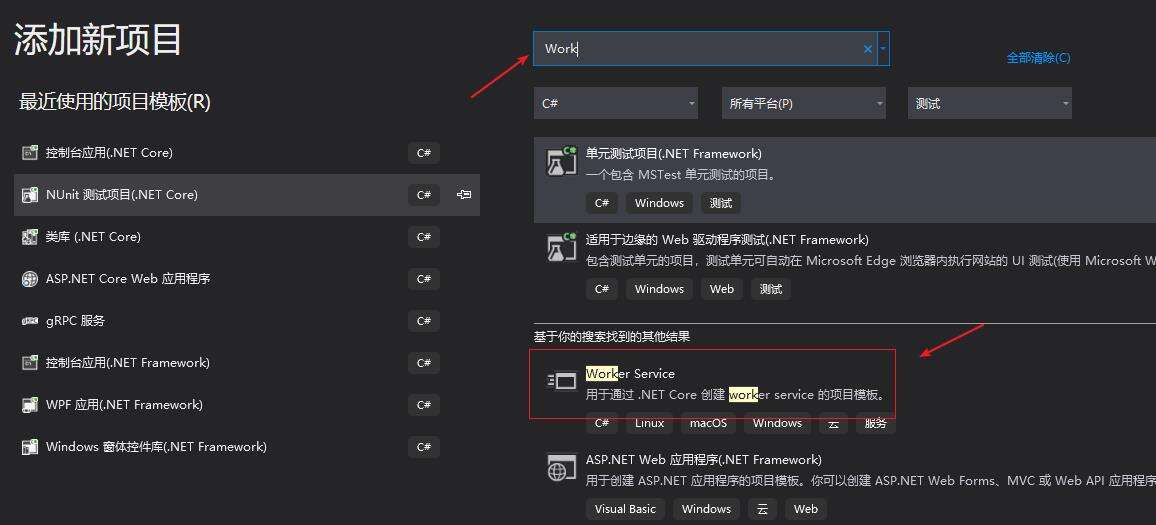
Asp.NetCore 3.1demo发布使用Windows服务

Core之Windows服务
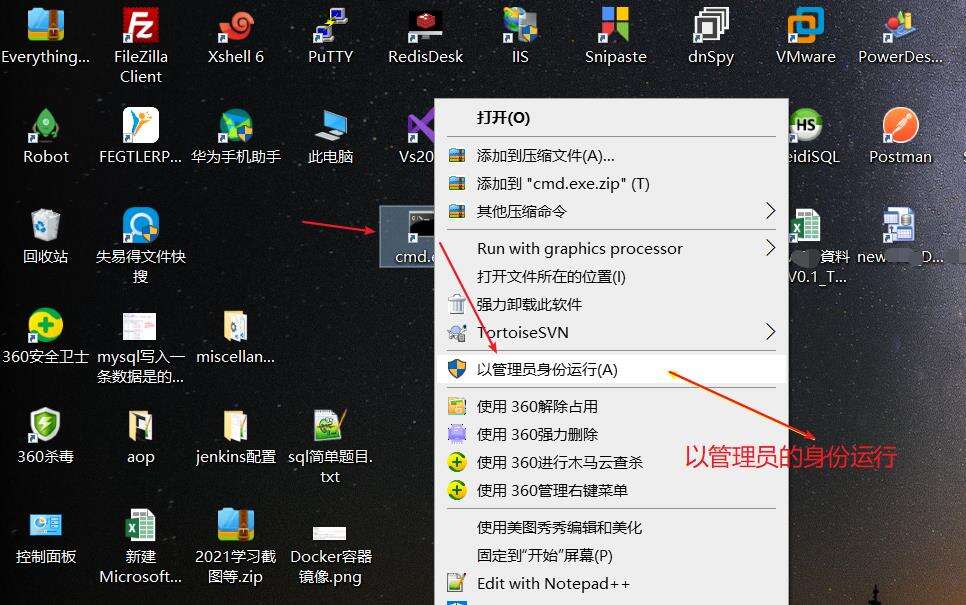
使用测试之前,先来简单了解一下 window自带的sc命令
========install.bat set serviceName=你的服务名称 set serviceFilePath=C:\CoreDemo\WorkerService\bin\Debug\netcoreapp3.0\MyWorkerService.exe set serviceDescription=服务描述 sc create 你的服务名称 BinPath=C:\CoreDemo\WorkerService\bin\Debug\netcoreapp3.0\MyWorkerService.exe sc config 你的服务名称 start=auto sc description 你的服务名称 服务描述信息 sc start 你的服务名称 pause ========unstall.bat set serviceName=你的服务名称 sc stop 你的服务名称 sc delete 你的服务名称 pause
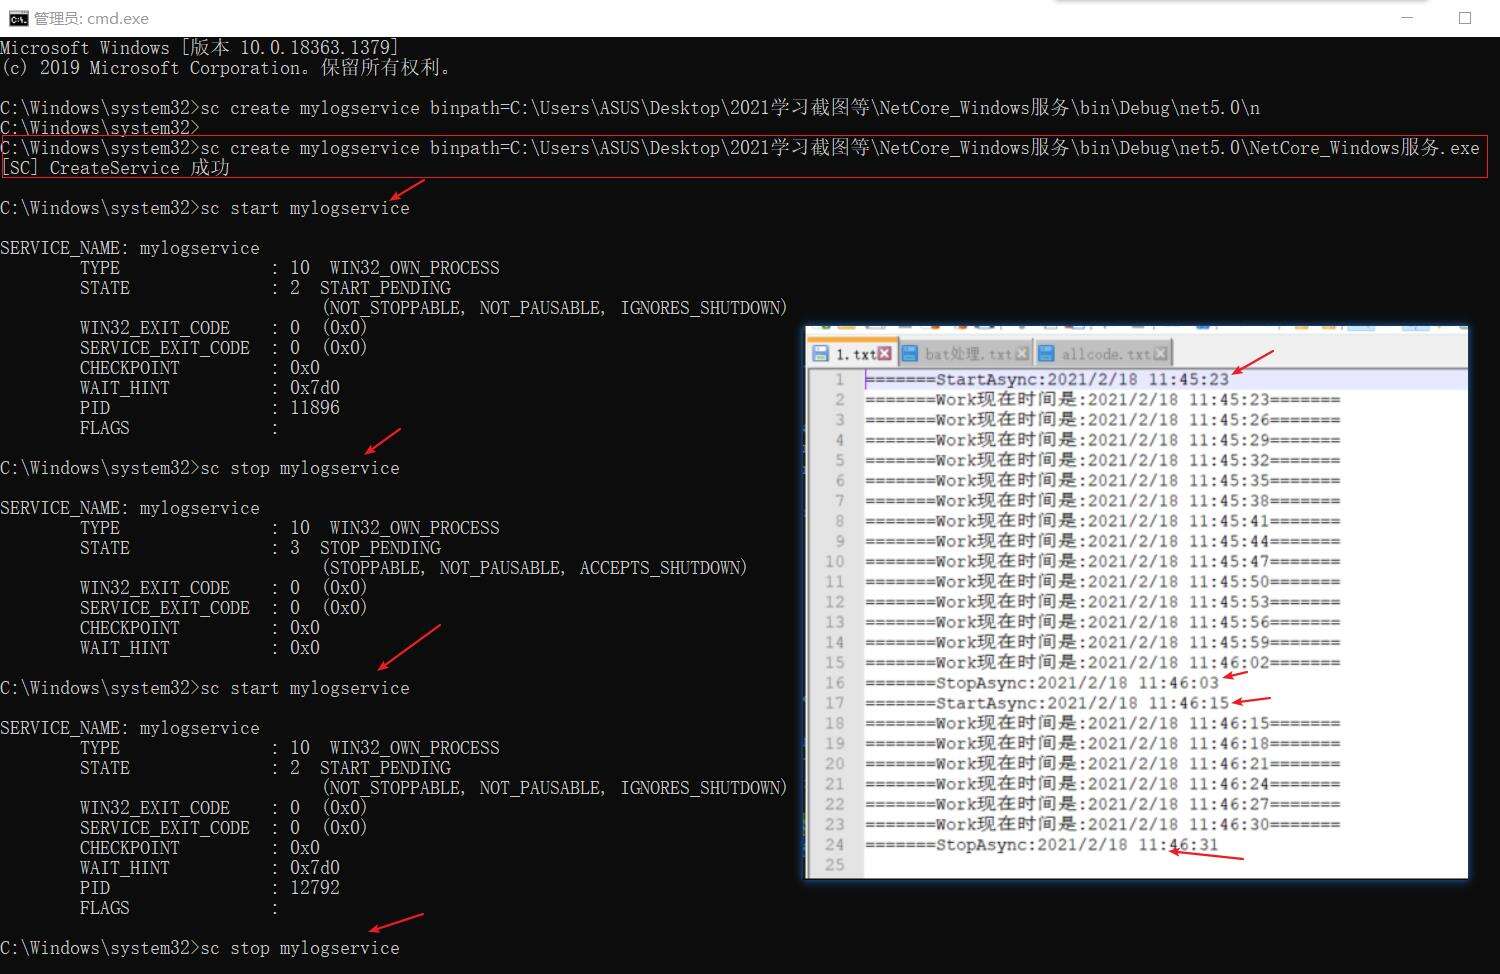
======================= 创建服务 >sc create 你的服务名称 BinPath=C:\CoreDemo\WorkerService\bin\Debug\netcoreapp3.0\MyWorkerService.exe 启动服务 >sc start 你的服务名称 停止服务 >sc stop 你的服务名称 删除服务 >sc delete 你的服务名称
添加服务描述
>sc description 你的服务名称 "描述"
>sc description mylogservice "mylog日志服务" ## 改变服务的启动方式 手动/自动/禁用 sc config 你的服务名称 start= demand/auto/disabled
全部code流程步骤如下:
1导包:
    /*
       <ItemGroup>
          <PackageReference Include="Microsoft.Extensions.Hosting" Version="5.0.0" />
          <PackageReference Include="Microsoft.Extensions.Hosting.WindowsServices" Version="5.0.1" />
       </ItemGroup>
     */


2 Program code
using System;
using System.Collections.Generic;
using System.Linq;
using System.Threading.Tasks;

namespace NetCore_Windows服务
{
    using Microsoft.Extensions.DependencyInjection;
    using Microsoft.Extensions.Hosting;
    public class Program
    {
        public static void Main(string[] args)
        {
            CreateHostBuilder(args).Build().Run();
        }

        public static IHostBuilder CreateHostBuilder(string[] args) =>
            Host.CreateDefaultBuilder(args)
                .ConfigureServices((hostContext, services) =>
                {
                    services.AddHostedService<Worker>();
                }).UseWindowsService();
    }
}


// 3 Worker

using System;
using System.Collections.Generic;
using System.Linq;
using System.Threading;
using System.Threading.Tasks;
using Microsoft.Extensions.Hosting;
using Microsoft.Extensions.Logging;

namespace NetCore_Windows服务
{
    using System.IO;
    public class Worker : BackgroundService
    {
        private readonly ILogger<Worker> _logger;

        public Worker(ILogger<Worker> logger)
        {
            _logger = logger;
            string newPath = GetLogFilePath();
            if (!File.Exists(newPath))
            {
                var filrStream = File.Create(newPath);
                filrStream.Close();
            }
        }
        public override  Task StartAsync(CancellationToken cancellationToken)
        {
            string newPath = GetLogFilePath();
            File.AppendAllLines(newPath, new List<string> { $"=======StartAsync:{DateTime.Now}" });
            return base.StartAsync(cancellationToken);
        }

        private static string GetLogFilePath()
        {
            var curentDurectory = AppDomain.CurrentDomain.BaseDirectory;
            string newPath = curentDurectory + "/Logs/1.txt";
            return newPath;
        }

        public override Task StopAsync(CancellationToken cancellationToken)
        {
            string newPath = GetLogFilePath();
            File.AppendAllLines(newPath, new List<string> { $"=======StopAsync:{DateTime.Now}" });
            return base.StopAsync(cancellationToken);
        }
        protected override async Task ExecuteAsync(CancellationToken stoppingToken)
        {
            while (!stoppingToken.IsCancellationRequested)
            {
                _logger.LogInformation("Worker running at: {time}", DateTimeOffset.Now);
                string newPath = GetLogFilePath(); ;
                File.AppendAllLines(newPath, new List<string> { $"=======Work现在时间是:{DateTime.Now}=======" });
                await Task.Delay(3000, stoppingToken);
            }
        }
    }
}
测试使用截图如下:(将来我们可能存在多个windows服务,我们命名服务名称和描述时尽量规则统一,便于识别)
注意事项:以前我们都是使用Windows服务的模板,这里为:(生成的core项目模板有Worker和Program两个主要的文件)