使用C#编程语言开发Windows Service服务

转载-https://www.cnblogs.com/yubao/p/8443455.html
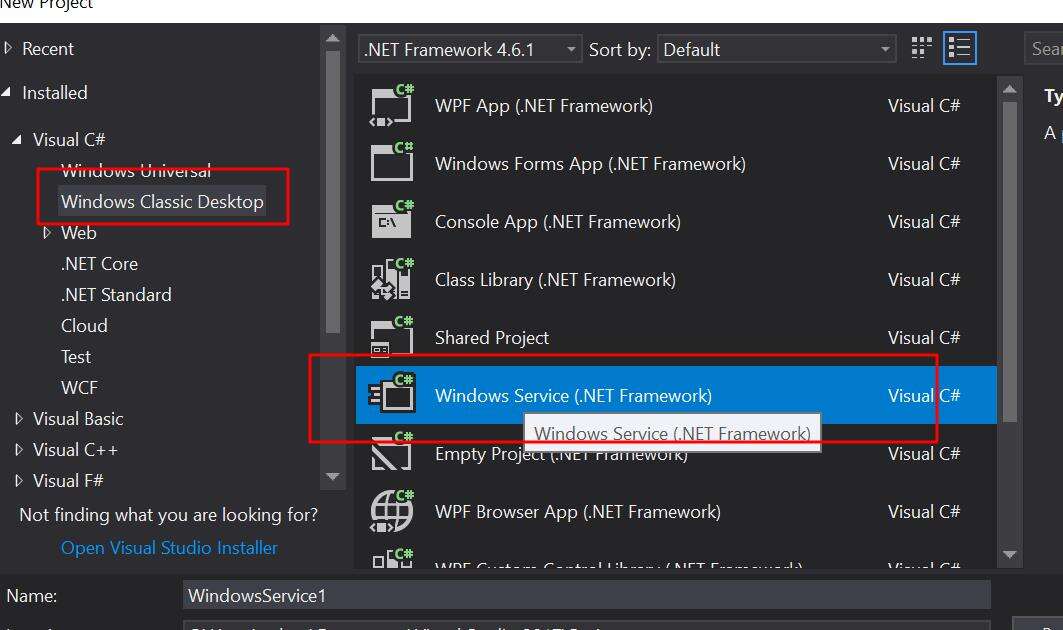
Create Windows Service project using Visual Studio
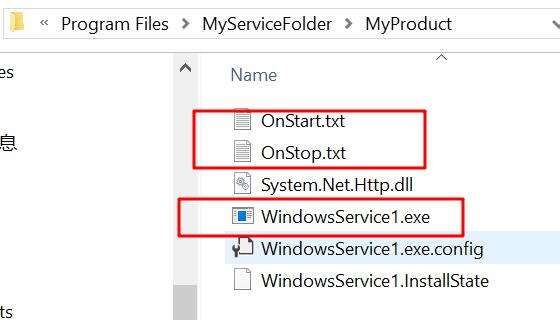
Create files on starting and stopping service:
   using System.IO;

   protected override void OnStart(string[] args)
    {
      File.Create(AppDomain.CurrentDomain.BaseDirectory + "OnStart.txt");
    }

    protected override void OnStop()
    {
      File.Create(AppDomain.CurrentDomain.BaseDirectory + "OnStop.txt");
    }
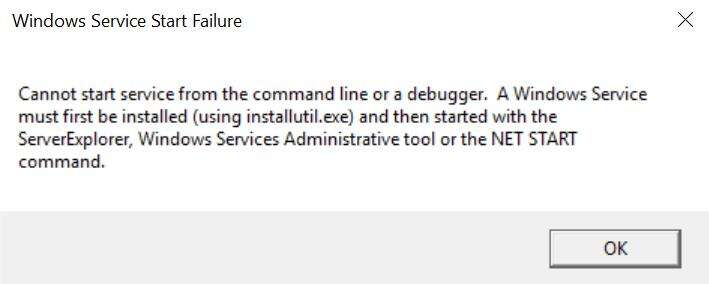
Try to run Windows Program on Debug mode
Click "Start" directly:
How to create a service use exe file
C:\Windows\system32>sc create -h
DESCRIPTION:
        Creates a service entry in the registry and Service Database.
USAGE:
        sc <server> create [service name] [binPath= ] <option1> <option2>...

OPTIONS:
NOTE: The option name includes the equal sign.
      A space is required between the equal sign and the value.
 type= <own|share|interact|kernel|filesys|rec|userown|usershare>
       (default = own)
 start= <boot|system|auto|demand|disabled|delayed-auto>
       (default = demand)
 error= <normal|severe|critical|ignore>
       (default = normal)
 binPath= <BinaryPathName to the .exe file>
 group= <LoadOrderGroup>
 tag= <yes|no>
 depend= <Dependencies(separated by / (forward slash))>
 obj= <AccountName|ObjectName>
       (default = LocalSystem)
 DisplayName= <display name>
 password= <password>
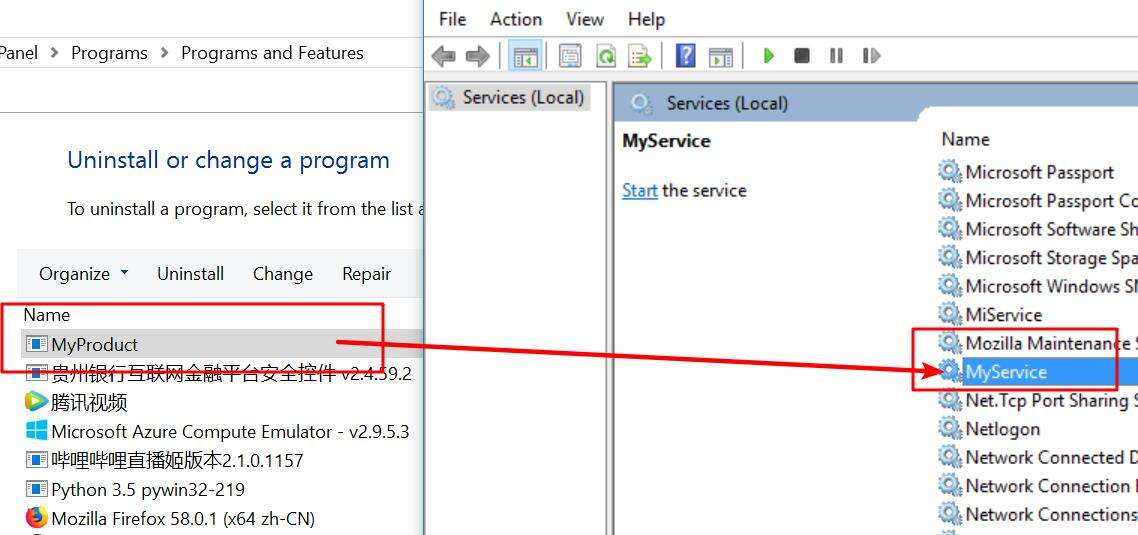
Start service use "sc create" command
C:\Windows\system32>sc create MyService binpath="C:\Users\yubao\Documents\Visual Studio 2017\Projects\WindowsService1\WindowsService1\bin\Debug\WindowsService1.exe" start=auto
[SC] CreateService SUCCESS
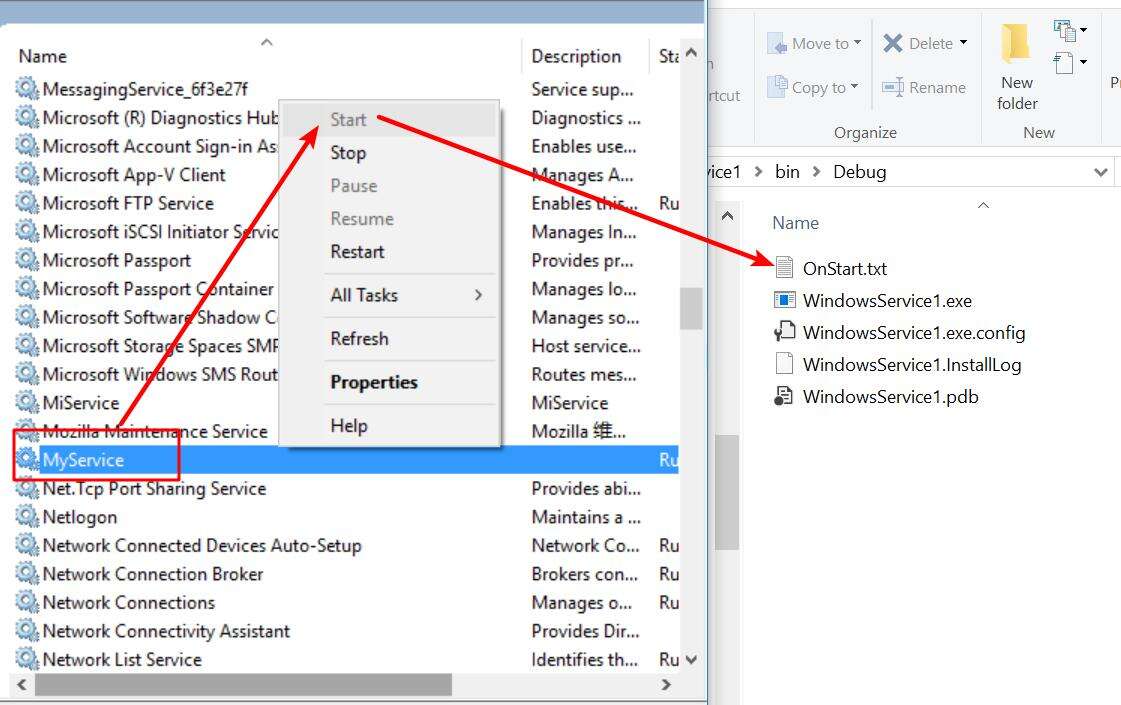
Start service:
Delete Service use "sc delete" command:
C:\Windows\system32>sc delete MyService
[SC] DeleteService SUCCESS
Install Service on Windows
Install Service to Windows use InstallUtil.exe:
Where InstallUtil.exe is:
for win32: C:\Windows\Microsoft.NET\Framework\v4.0.30319
for win64: C:\Windows\Microsoft.NET\Framework64\v4.0.30319
Install Service:
C:\Windows\system32>InstallUtil.exe C:\Users\yubao\Documents\Visual Studio 2017\Projects\WindowsService1\WindowsService1\bin\Debug\WindowsService1.exe
Uninstall Service:
C:\Windows\system32>InstallUtil.exe /u "C:\Users\yubao\Documents\Visual Studio 2017\Projects\WindowsService1\WindowsService1\bin\x64\Release\WindowsService1.exe"
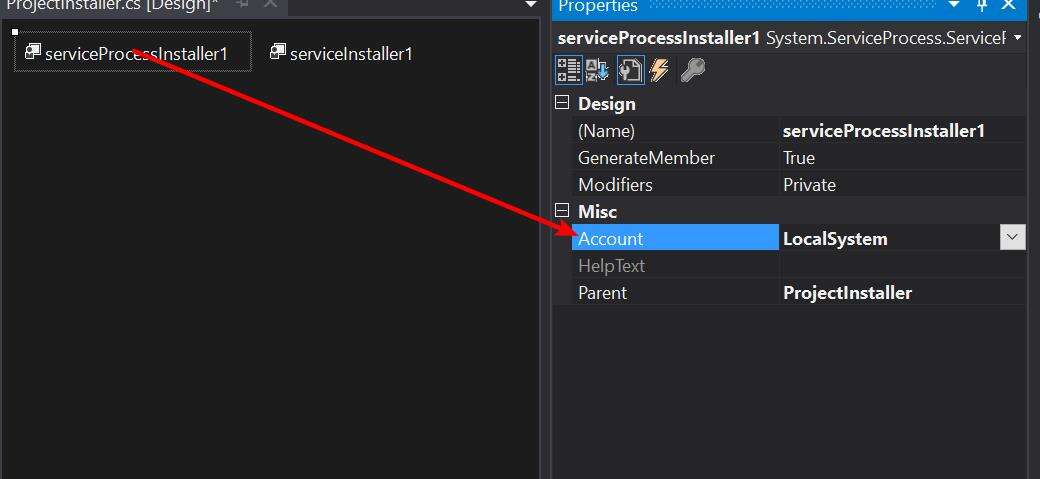
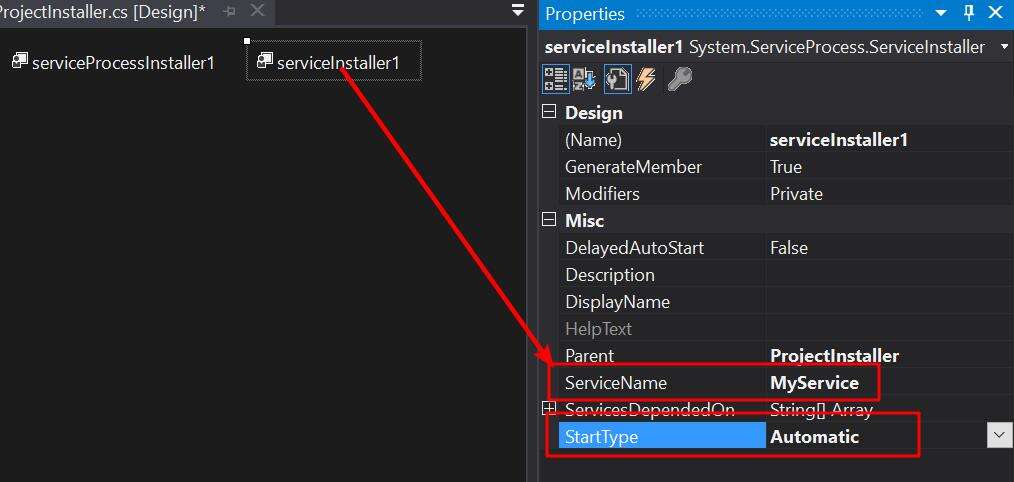
Use Setup Project to Install windows service
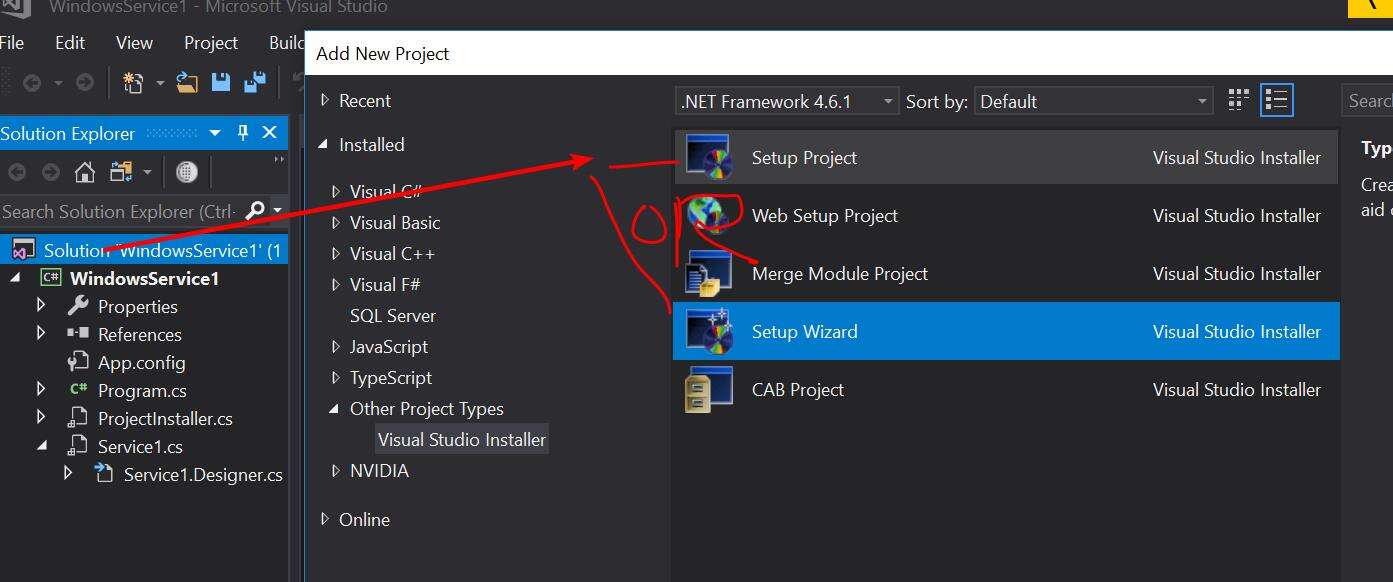
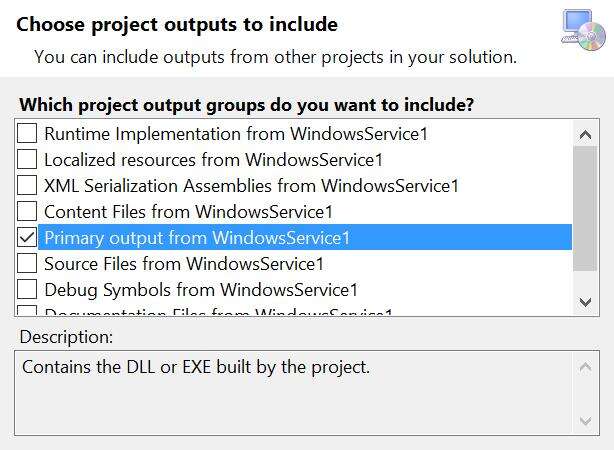
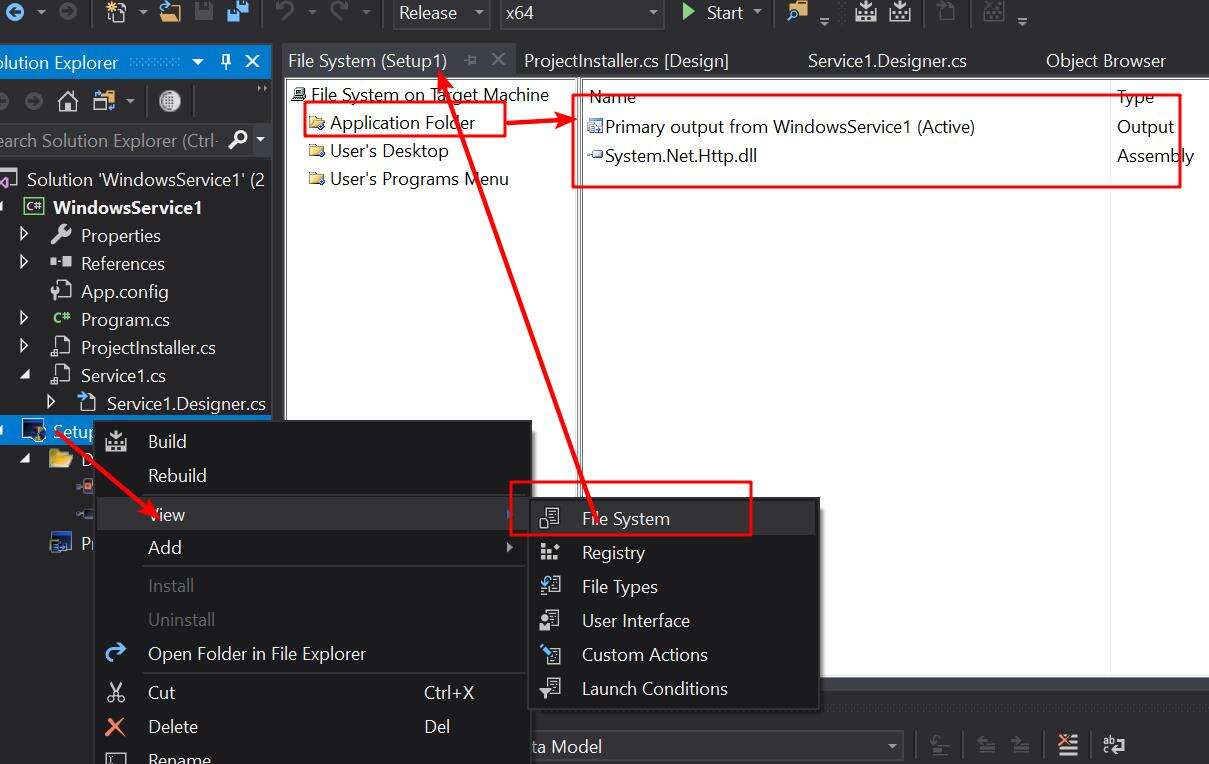
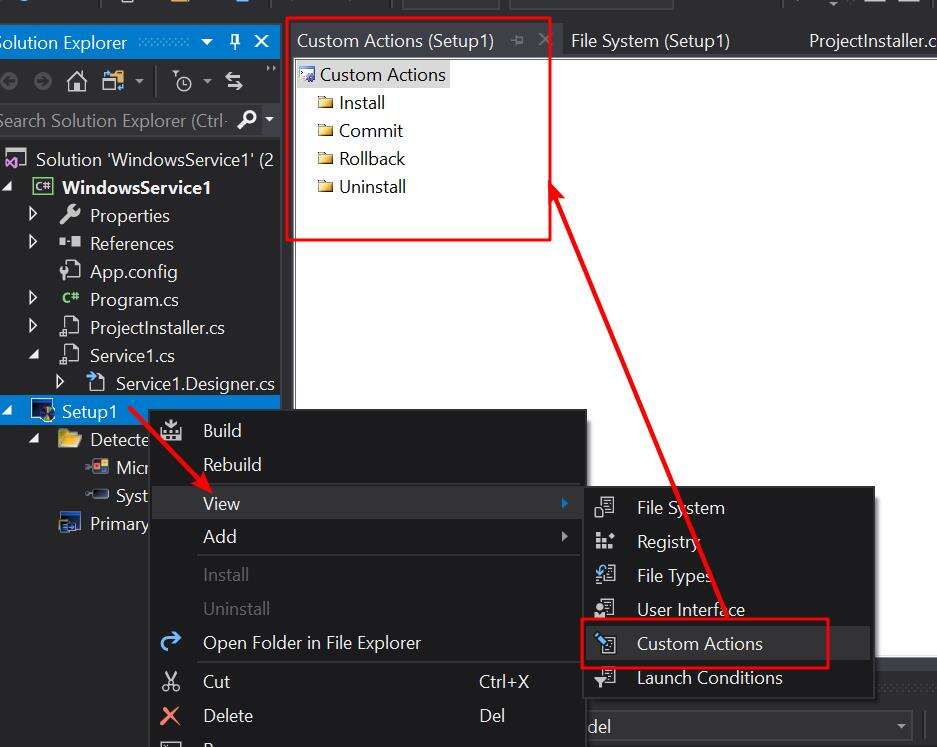
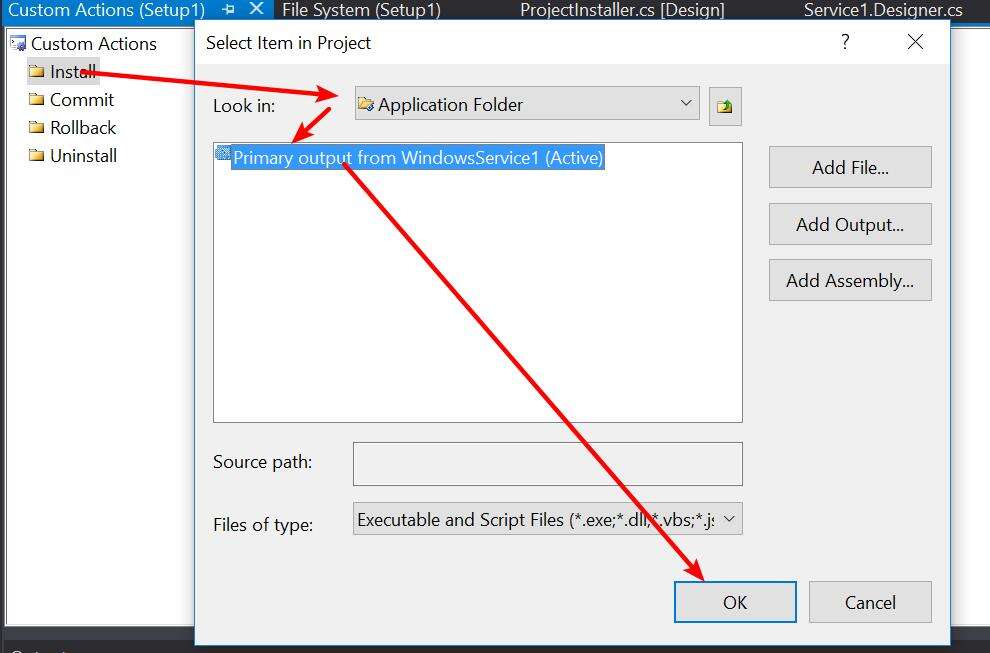
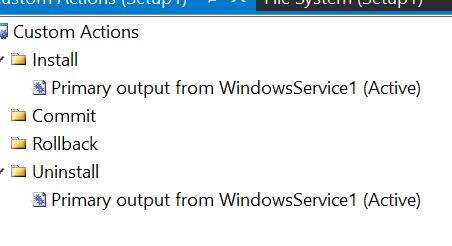
Build Setup Project to generate Installer files:
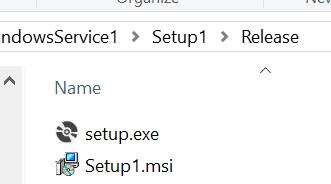
Double click "Setup.exe/msi" to start installation. And then you will see this typicall error for x64 target platform: ( for win32, you will never see this error)
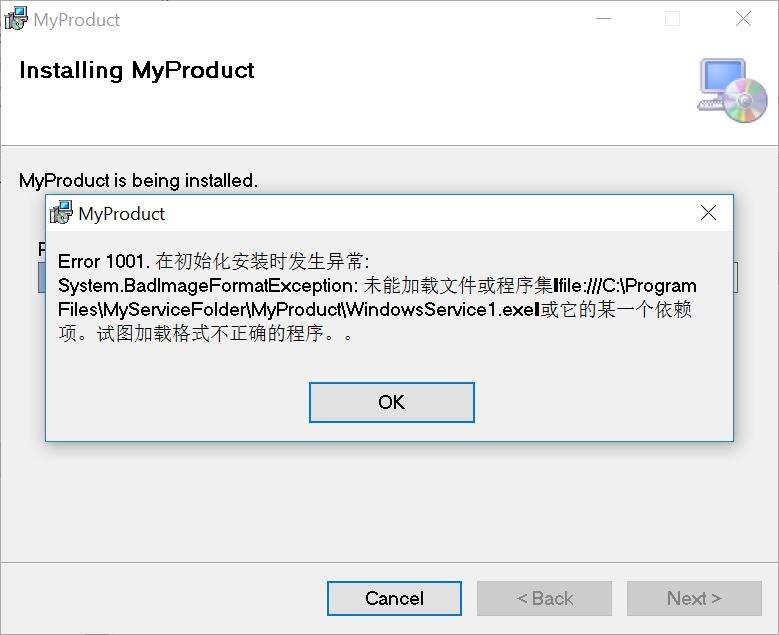
How to solve E1001 under x64 target system:
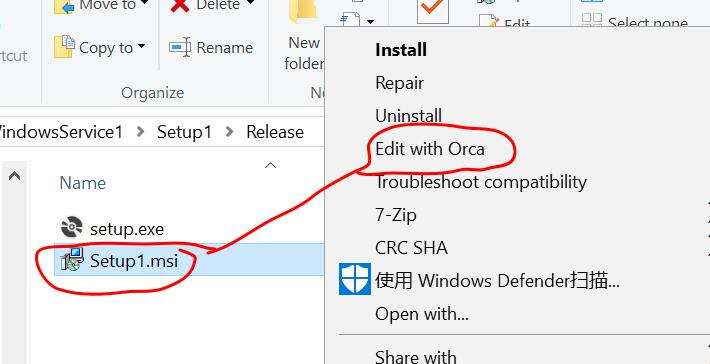
Download orca.exe from ORCA MSI Editor Standalone Download
Orca MSI Editor allows you to edit the properties of any MSI file. With this tool, you can change the title and text within the installer an look at how and where the files are delivered. It’s also handy if you need to “hack” an MSI to work with a newer version of Windows.
Edit .msi file with "orca.exe " tool:
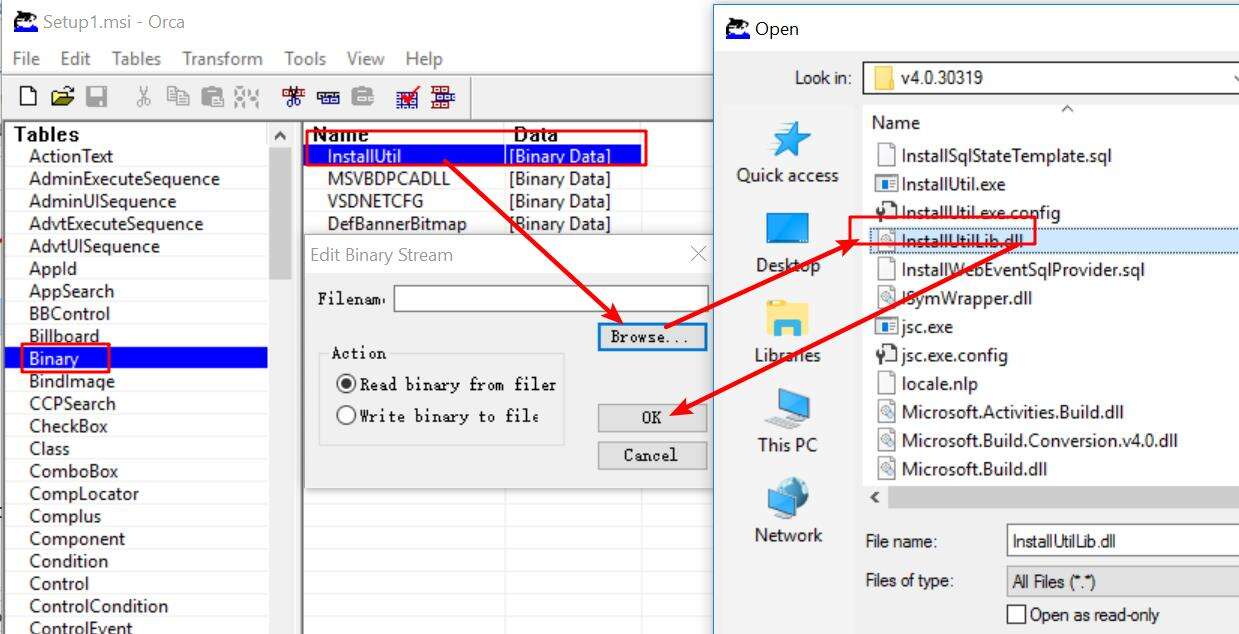
modify binary path to "C:\Windows\Microsoft.NET\Framework64\v4.0.30319\InstallUtilLib.dll"

Final install path:
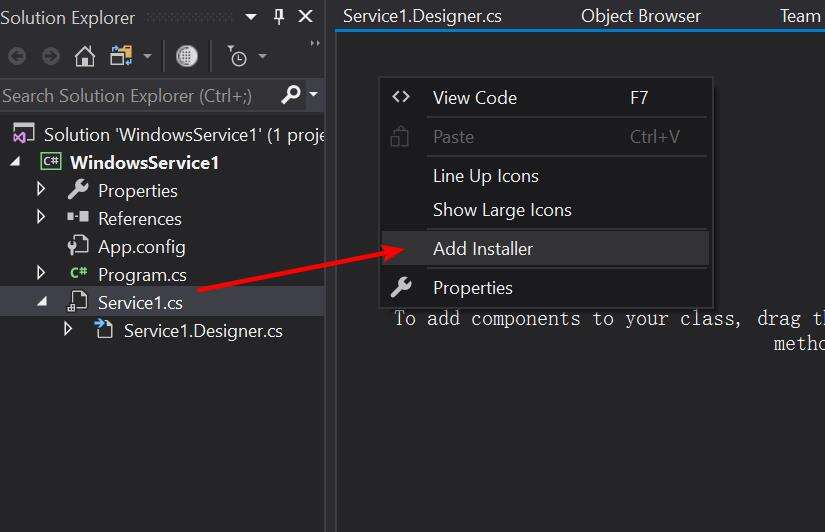
How to Debug Windows Service program on Visual Studio:
Service1.cs
using System;
using System.Collections.Generic;
using System.ComponentModel;
using System.Data;
using System.Diagnostics;
using System.Linq;
using System.ServiceProcess;
using System.Text;
using System.Threading.Tasks;
using System.IO;

namespace WindowsService1
{
  public partial class Service1 : ServiceBase
  {
    public Service1()
    {
      InitializeComponent();
    }

    public void OnDebug()
    {
      string[] str = { "0" };
      OnStart(str);
    }

    protected override void OnStart(string[] args)
    {
      File.Create(AppDomain.CurrentDomain.BaseDirectory + "OnStart.txt");
    }

    protected override void OnStop()
    {
      File.Create(AppDomain.CurrentDomain.BaseDirectory + "OnStop.txt");
    }

  }
}
Program.cs
using System;
using System.Collections.Generic;
using System.Linq;
using System.ServiceProcess;
using System.Text;
using System.Threading.Tasks;

namespace WindowsService1
{
  static class Program
  {
    /// <summary>
    /// The main entry point for the application.
    /// </summary>
    static void Main()
    {
#if DEBUG
      Console.WriteLine("This is debug mode");
      Service1 myService = new Service1();
      myService.OnDebug();
#else
      ServiceBase[] ServicesToRun;
      ServicesToRun = new ServiceBase[]
      {
                new Service1()
      };
      ServiceBase.Run(ServicesToRun);
#endif

    }
  }
}
How to make service auto start after installation:
ProjectInstaller.cs
using System;
using System.Collections;
using System.Collections.Generic;
using System.ComponentModel;
using System.Configuration.Install;
using System.Linq;
using System.ServiceProcess;
using System.Threading.Tasks;
namespace WindowsService1
{
[RunInstaller(true)]
public partial class ProjectInstaller : System.Configuration.Install.Installer
{
public ProjectInstaller()
{
InitializeComponent();
}
private void serviceInstaller1_AfterInstall(object sender, InstallEventArgs e)
{
new ServiceController(serviceInstaller1.ServiceName).Start();
}
}
}